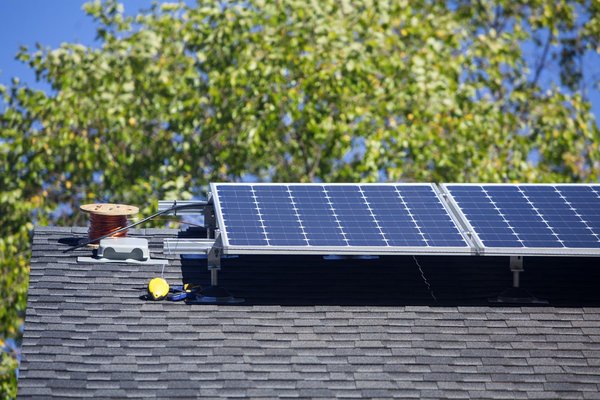
Harnessing solar energy not only helps reduce your carbon footprint but also leads to significant savings on your energy bills. Installing solar panels yourself can be a rewarding project, providing long-term benefits and a sense of accomplishment. This guide will walk you through the steps, materials needed, and best practices for a successful DIY solar panel installation.
Understanding Solar Power Basics
Before embarking on your solar panel installation journey, its essential to familiarize yourself with the basics of solar power. Solar panels generate electricity by converting sunlight into energy through photovoltaic (PV) cells. Here are a few key concepts to understand:
- Solar Panel Types: There are primarily three types of solar panels - monocrystalline, polycrystalline, and thin-film. Each has distinct efficiency levels and costs. Monocrystalline panels are favored for their efficiency, while polycrystalline panels are typically more affordable.
- Inverters: An inverter transforms the DC electricity generated by solar panels into AC electricity, which is usable in homes. Choosing a high-quality inverter is critical for optimal system performance.
- Battery Storage: If you wish to store excess energy for use during cloudy days or nights, consider integrating a battery storage system.
For further reading on solar panel technologies, visit the U.S. Department of Energy.
Planning Your Solar Panel Installation
Before you begin, careful planning is essential. Follow these steps to ensure a smooth installation process:
- Evaluate Your Energy Needs: Review your energy bills to understand your current consumption. This data will help determine how many panels you need.
- Assess the Site: Check your roofs orientation, pitch, and shading from trees or neighboring buildings. A south-facing roof with minimal shade will yield the best results.
- Check Local Regulations: Contact your local building department to understand zoning laws, permits, and potential rebates available for solar installations.
- Building permits may be required.
- Research any incentives that could lower your overall costs.
Tools and Materials Needed
To install solar panels yourself, youll need some basic tools and materials. Here’s a comprehensive list:
- Solar Panels: Purchase panels based on your energy needs.
- Inverter: Choose a compatible inverter for your system.
- Mounting Hardware: This will secure your panels to the roof.
- Electrical Wiring: Necessary for connecting the panels to your inverter and the electrical system.
- Safety Gear: Always use safety goggles, gloves, and a harness when working on your roof.
- Tools: A drill, screwdriver, ladder, and a level are essential.
For tools and materials, check out retailers like Home Depot or Lowes.
Step-by-Step Installation Process
- Install Mounting Brackets: Start by attaching the mounting brackets to your roof according to the manufacturers instructions. Ensure they are securely anchored to the rafters.
- Position the Solar Panels: Place the solar panels onto the installed brackets and secure them. Ensure they are aligned properly for maximum sunlight exposure.
- Wire the Panels Together: Connect the solar panels according to the specific wiring diagram provided by the manufacturer. This may involve both series and parallel connections to achieve the required voltage.
- Connect the Inverter: Install the inverter close to where the solar panels are located but in an accessible area for maintenance. Connect the wiring from the panels to the inverter, following the instructions carefully.
- Connect to the Electrical System: Hook up your inverter to your home’s electrical system. It’s wise to consult with an electrician at this stage to ensure everything meets code and is safe.
- Inspect and Test the System: Check all connections, turn on the system, and test the output. Utilize a multimeter to measure the voltage coming from the panels.
Maintenance and Safety Tips
Once your solar panel system is installed, it’s crucial to maintain it properly for optimal performance:
- Regular Cleaning: Clean your solar panels at least once a year to remove dirt, debris, and grime that could block sunlight.
- Monitor Performance: Keep track of your energy output using monitoring tools to quickly identify and address any issues.
- Safety First: If climbing onto the roof is necessary, always use a sturdy ladder and wear appropriate safety gear. Consider hiring a professional for maintenance tasks that require roof access.
For further guidance on safety practices, refer to the Occupational Safety and Health Administration.
Troubleshooting Common Issues
As with any DIY project, there may be challenges along the way. Common issues and solutions include:
- Low Power Output: Ensure there are no obstructions casting shadows on your panels and check for any dirt buildup.
- Inverter Faults: If the inverter is displaying error codes, consult the manual for troubleshooting tips or seek professional help.
- Wiring Problems: Double-check all connections and ensure that wiring is not damaged or improperly connected.
For detailed troubleshooting guidance, consider visiting the Solar Energy Industries Association.
Installing solar panels yourself can be a rewarding and cost-effective way to embrace clean energy and reduce your electricity bills. By carefully planning your system, understanding local regulations, and following safety precautions, you can successfully set up a solar array tailored to your home’s needs. However, it’s essential to recognize your limits—when in doubt, consult with licensed professionals to ensure your system is safe, compliant, and optimized for performance. With the right approach, your DIY solar installation can be a smart step toward energy independence and environmental sustainability.